LAMP : Linux / Apache / MariaDB / PHP
Sources :
Comment installer un serveur LAMP sous Debian (documentation OVH)
Installer un serveur LAMP (Linux Apache MariaDB PHP) sous Debian 11
Installer Apache :
Voir l’article correspondant.
Installer PHP :
Voir l’article correspondant.
Installer MariaDB :
Sources :
Debian 11 Bullseye : installer et configurer MariaDB
sudo apt-get update
sudo apt-get install mariadb-server
sudo mysql_secure_installation
NOTE: RUNNING ALL PARTS OF THIS SCRIPT IS RECOMMENDED FOR ALL MariaDB
      SERVERS IN PRODUCTION USE!  PLEASE READ EACH STEP CAREFULLY!

In order to log into MariaDB to secure it, we'll need the current
password for the root user. If you've just installed MariaDB, and
haven't set the root password yet, you should just press enter here.

Enter current password for root (enter for none):
Appuyer sur Entrée.
OK, successfully used password, moving on...

Setting the root password or using the unix_socket ensures that nobody
can log into the MariaDB root user without the proper authorisation.

You already have your root account protected, so you can safely answer 'n'.

Switch to unix_socket authentication [Y/n]
Appuyer sur Y.
Enabled successfully!
Reloading privilege tables..
 ... Success!


You already have your root account protected, so you can safely answer 'n'.

Change the root password? [Y/n]
Appuyer sur Y et choisir un mot de passe root différent de celui de Debian.
New password:
Re-enter new password:
Password updated successfully!
Reloading privilege tables..
 ... Success!


By default, a MariaDB installation has an anonymous user, allowing anyone
to log into MariaDB without having to have a user account created for
them.  This is intended only for testing, and to make the installation
go a bit smoother.  You should remove them before moving into a
production environment.

Remove anonymous users? [Y/n]
Appuyer sur Y.
 ... Success!

Normally, root should only be allowed to connect from 'localhost'.  This
ensures that someone cannot guess at the root password from the network.

Disallow root login remotely? [Y/n]
Appuyer sur Y.
 ... Success!

By default, MariaDB comes with a database named 'test' that anyone can
access.  This is also intended only for testing, and should be removed
before moving into a production environment.

Remove test database and access to it? [Y/n]
Appuyer sur Y.
 - Dropping test database...
 ... Success!
 - Removing privileges on test database...
 ... Success!

Reloading the privilege tables will ensure that all changes made so far
will take effect immediately.

Reload privilege tables now? [Y/n]
Appuyer sur Y.
 ... Success!

Cleaning up...

All done!  If you've completed all of the above steps, your MariaDB
installation should now be secure.

Thanks for using MariaDB!
MariaDB est désormais installée. On va tester si la connexion à la base de données fonctionne. On entre d’abord le mot de passe lié à sudo puis quand on nous le demande le mot de passe root de MariaDB.
sudo mariadb -u root -p
show databases;

+--------------------+
| Database           |
+--------------------+
| information_schema |
| mysql              |
| performance_schema |
+--------------------+
3 rows in set (0.001 sec)

exit
À chaque changement de configuration de MariaDB, Il faut redémarrer le service :
sudo systemctl restart mariadb
Installer Adminer (pour gérer plus facilement mes bases de données) :
sudo apt-get update
sudo apt-get install adminer

Le fichier de configuration Apache pour Adminer est ici :
sudo nano /etc/apache2/conf-available/adminer.conf
Il contient :

Alias /adminer /etc/adminer

<Directory /etc/adminer>
        Require all granted
        DirectoryIndex conf.php
</Directory>


sudo a2enconf adminer.conf
sudo systemctl reload apache2
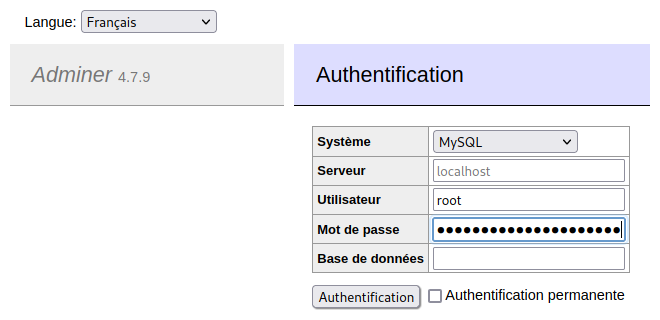
Debian 11 installe la version 4.7.9 d’Adminer. Pour y accéder :
https:// [ nom de domaine ] /adminer
Attention aux problèmes de sécurité : Une fois en production, il vaut mieux désinstaller Adminer.


